You order a beautiful drink at a bar, and it looks amazing. But when you snap a photo on your phone, it turns out dark, blurry, and unappetizing. Frustrating, right?
I get it. It’s disappointing to see your cocktail photos fall flat. That’s why I’m here.
This article will give you simple, actionable tips for taking incredible, authentic fotos reales de tragos en bares using just your smartphone.
We’re not talking about professional, staged photography. This is about capturing the real look and feel of a cocktail in its natural environment. By the end, you’ll have the skills to make your social media feed look like a pro cocktail enthusiast’s.
No fancy equipment needed. Just the phone that’s already in your pocket.
Mastering the Bar Environment: How to Find and Use Light
Low light is the number one enemy of good drink photography. It’s tempting to use your camera’s built-in flash, but that creates harsh glare and washes out color.
Instead, identify the best available light source, even if it’s dim. This could be a nearby window, a single candle on the table, a stylish neon sign, or an overhead pendant light.
Pro tip: use a friend’s phone flashlight as a ‘side light.’ Hold it off to the side and slightly above the drink to create depth and highlight the glass, rather than pointing it directly.
Manually adjust exposure on a smartphone by tapping the screen on the drink and sliding the sun icon up or down. This brightens the scene without blowing out the highlights.
Embrace the moodiness of a dark bar. Use shadows to create a dramatic, atmospheric shot that tells a story about the venue.
Think about how the light catches the condensation on the glass or makes the ice cubes sparkle. Fotos reales de tragos en bares often capture this perfectly.
| Light Source | Effect |
|---|---|
| Nearby Window | Soft, natural light |
| Candle | Warm, intimate glow |
| Neon Sign | Vibrant, colorful light |
| Pendant Light | Direct, focused light |
By following these tips, you can take stunning, atmospheric photos in any bar setting.
Composition 101: Arranging Your Shot for Maximum Impact
When it comes to taking a great photo, the ‘Rule of Thirds’ is your best friend. Imagine your frame divided into nine equal parts by two horizontal and two vertical lines. Place the drink where these lines intersect for a more dynamic and professional-looking shot.
Now, let’s talk camera angles. The top-down shot is perfect for showing off garnishes and the overall presentation. An eye-level shot makes you feel like you’re about to take a sip, creating a personal connection.
And the low-angle shot? It makes the drink look heroic and tall, almost like a skyscraper in a cityscape.
Backgrounds matter. A cluttered table with napkins and receipts can ruin a good shot. Instead, aim for a blurry background that captures the ambiance of the bar.
This keeps the focus on the cocktail and adds a touch of atmosphere. fotos reales de
Leading lines are another powerful tool. Use the edge of the bar, a straw, or the curve of a table to draw the viewer’s eye directly to the cocktail. It’s like pointing a finger at the star of the show.
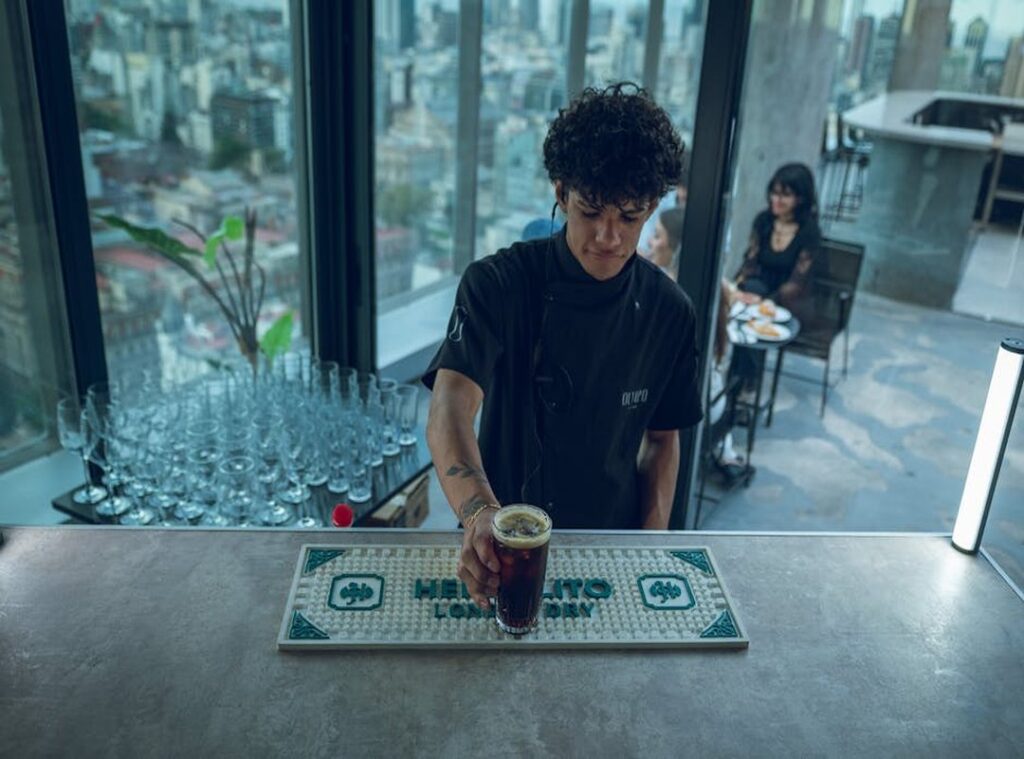
Adding a human element can tell a story. A hand reaching for the glass or the bartender working in the blurred background brings life to the photo. It’s not just a drink; it’s a moment.
Take multiple shots from slightly different angles and compositions. This gives you options later and increases the chances of getting that perfect shot.
Fotos reales de tragos en bares often showcase these techniques. They use the Rule of Thirds, play with angles, and keep the background clean and simple. It’s all about making the drink the hero of the photo.
Making the Drink the Star: Focus, Detail, and Simple Styling
When it comes to capturing the perfect shot of your drink, using your smartphone’s ‘Portrait Mode’ or a similar feature can make all the difference. This mode creates a shallow depth of field, keeping the drink sharp while artfully blurring the background.
Tap your screen to set the focus point precisely on the most interesting part of the drink. Maybe it’s the rim of the glass, a vibrant garnish, or the foam on top. This simple step can transform an ordinary photo into something special.
Simple styling tips can elevate your shot. Wipe away any drips on the glass or spills on the table. Move unnecessary clutter like keys or wallets out of the frame.
A clean, uncluttered shot lets the drink be the star.
Details matter. Capture the condensation beading on a cold glass, the texture of a citrus peel, or the rich color of the liquid. These small details make a drink look appealing and inviting.
Take the photo as soon as the drink is served. This is when it looks its freshest, the foam is perfect, and the ice hasn’t melted. Timing is everything in photography, especially with drinks.
A final tip: a small boost in brightness, contrast, or saturation in a simple editing app can make the ‘real’ colors of the drink pop without looking fake. Just a little tweak can go a long way.
fotos reales de tragos en bares are a great example of how these techniques can bring out the best in your drink photos.
From Blurry Mess to Bar-Worthy Masterpiece
Find the best light, compose your shot thoughtfully, and focus on the details that make the drink special. These are the core lessons to elevate your drink photography.
Taking fotos reales de tragos en bares is a skill anyone can master with their smartphone by applying these simple techniques. The goal is to capture not just a picture of a drink, but the memory and vibe of the experience.
The next time you’re out and a beautiful cocktail is placed in front of you, take 30 seconds to apply one of these tips. You’ll be amazed at the difference.
Never settle for a bad drink photo again.